Friday, December 3, 2010

Greaser Jeans: The Last Muslin

Here is the fifth muslin for my greaser jeans.  It appears I have resolved the baggy crotch.  All I had to do was decrease the back crotch extention.  The point that sticks out on the back piece - take it in a bit, following the crotch line, and then taper and blend into the existing in-seam.  Make sense? 
Now I would love to make these up right away.  But the holidays are approaching and I have a few christmas gifts I need to sew first. 


Thursday, December 2, 2010

Greaser Jeans?

After reviewing the pictures of my greaser jeans muslins it appears I am going in the wrong direction.  My second muslin, is by far, the best one.  I made a fourth muslin and it was HORRIBLE.  I didn't even take pictures.  Sooooo, from the second muslin, I will be decreasing the back crotch extension.  Hopefully, this will pull-in the front crotch.  

Also, WildGinger software is on sale for the holidays.  That includes the PatternMaster Boutique program I'm using.

Tuesday, November 30, 2010

GRRRRRreaser Jeans: Third muslin - *sigh*

Pants are HARD!!!  Here are the first and second muslins.  For the third muslin, I decided to add .5" to the back crotch extension.  And I changed the shape of the front crotch to something flatter and less roomy.  Here is what I got. 


I omitted the back yoke because it has nothing to do with the fit.  The back crotch fits better, however I still have a massive pouch on the front.  So perhaps I should reduce the front crotch extension....I turned my pants inside out to expose the intersecting crotch seams.  Then I made a small fold on the front side of the seam and pinned.  I had to do this several times to get the fold the right size.

Finally...


I will measure the fold, multiply by 2, and that will be the crotch extension adjustment.   I hope this is the last muslin.

Sunday, November 28, 2010

Yay! Estate sales!

Here is what I picked up at the estate sale. 
First up, a smocking guide by Dritz.


Next up, a Johnny Cash record.

A beautiful piece of round luggage.  It still has the cardboard insert. 

I'm going to use this fine crochet cotton for hand basting. 

This tracing kit still has all it's components. 

These are the patterns I picked up -mostly because of the smocking. 

Buttons!  There were SOO many beautiful buttons. 
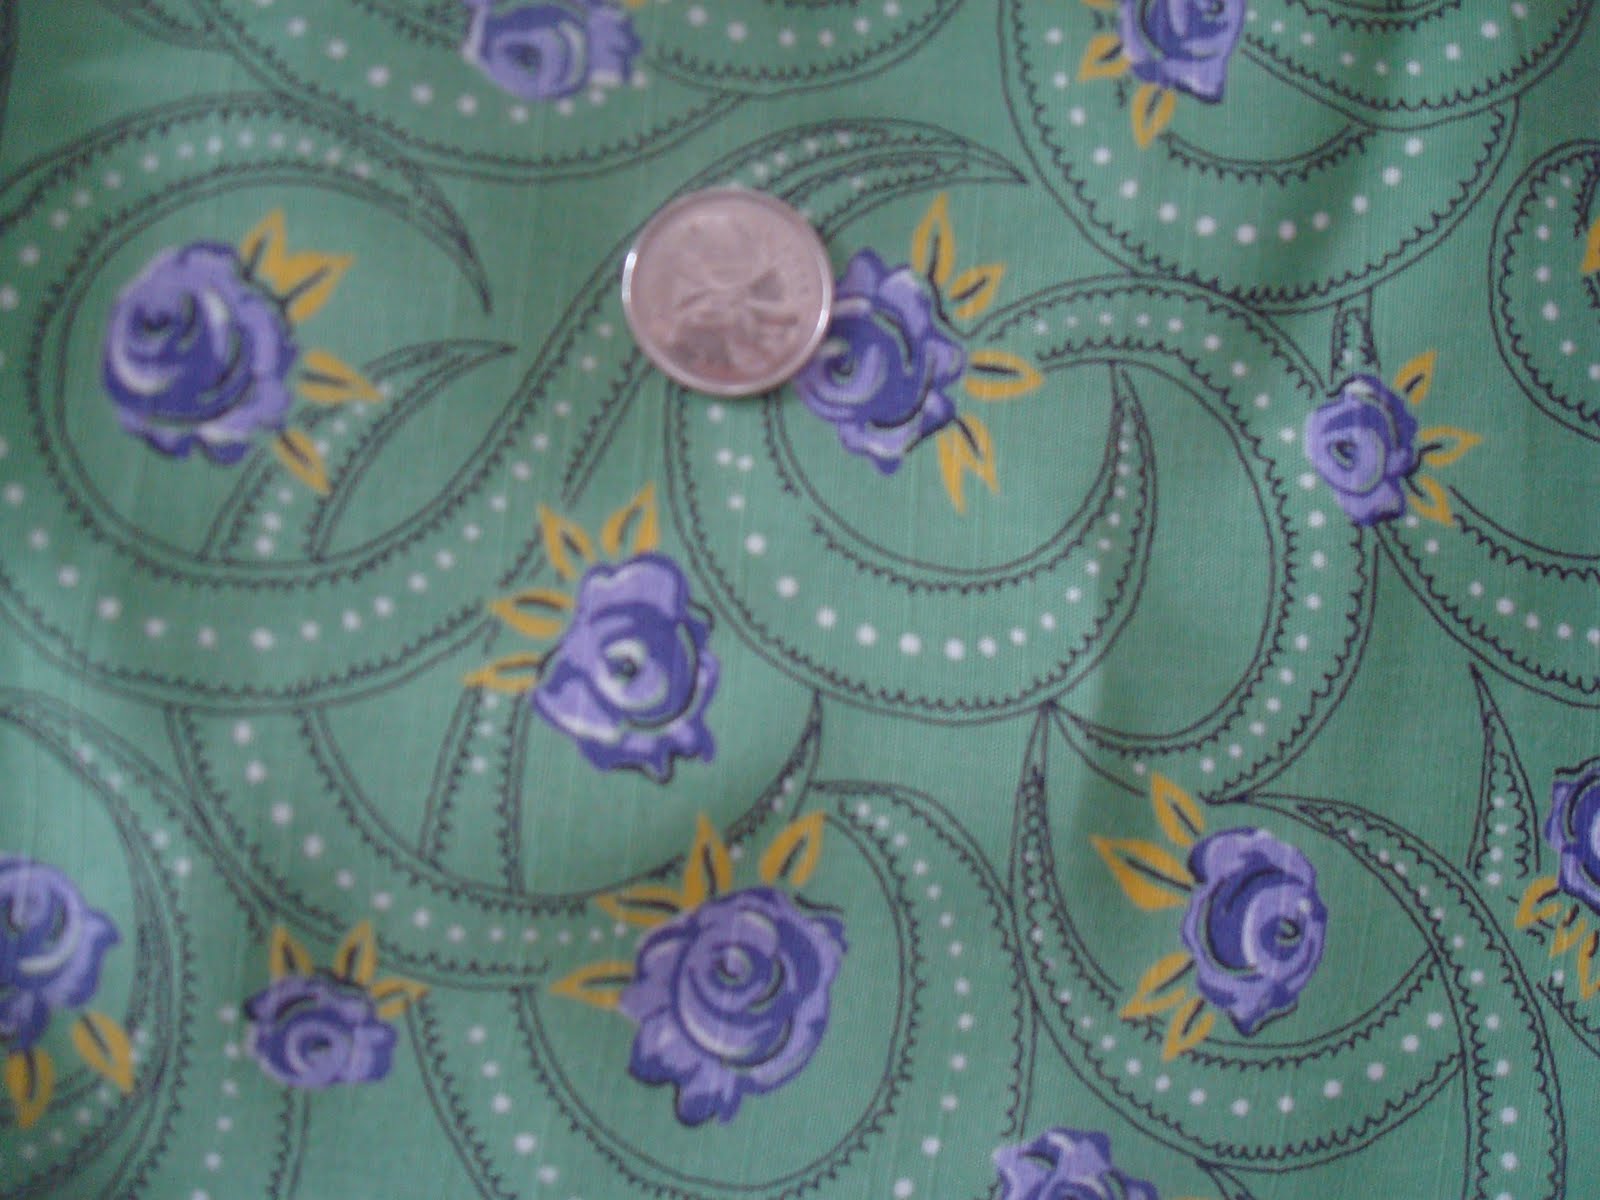
And at least two full length tables covered in fabric....Here is what I picked up.  The quarter is to help you gage the size of the print.  I still need to measure the width and yardage of each piece. 

The red flowers are gorgeous but the whole print is a little dark.  I'm not sure yet what to do with it. 

The most beautiful cheong-sam. 

Maybe a blouse, maybe a dress.  This one is very lightweight, great for hot and muggy summer days. 

A nice tartan.  It's not reeeaaallly my colour.  Still nice to have. 

I already have a blouse in mind for this tartan. 

summer.dress. 

This one is actually quite sheer.  I may try a sheer blouse. 

Probably a blouse too.  Maybe a playsuit if the yardage is right. 

The estate auction I attended yesterday wasn't great.  It was held outside and it was FREEEZING.  We couldn't stay long.  I can't believe we have five more months of this.  We shoveled the driveway three times this weekend.  
Bright fabrics and flowery prints are my comfort - my sewing studio, my sanctuary.

Friday, November 26, 2010

What do you mean 'The patterns are all gone' ?

Something very curious happened today. 
First a little background.  I live in a very small township, very rural and quaint.  I thought I was the only person interested in vintage sewing and fashions.  Apparently I was wrong.

I went to an estate sale today.  The quantity of needlework and crafts supplies was incredible.  I could have filled a phone booth with the yarn alone.  There were also some fabrics and a few patterns.  But the patterns were pretty beat up, and they were all for children.  I asked if they had patterns for adults.  She said two girls had come in earlier and cleaned them out along with all the old sewing manuals.  They were even on the phone with another girl who gave them advice on what to take.   Zzzzzhhhhhaaaaa?????  I was sad about missing the patterns but I was even more shocked to learn that I was not alone.  I guess I need to 'up' my game. 

I did manage to pick up a few things.  I'll take some pictures this weekend.  I am also going to an estate auction tomorrow.  Though it's mostly for my husband - millwright tools - they also advertised a sewing machine.  Sewing patterns can't be too far behind.  Wish me luck!

Thursday, November 25, 2010

Greaser Jeans: The second muslin

Here are the greaser jeans, round two.  You can see round one here.


I added ease in the crotch length and hips.  I'm pretty happy with everything, except the crotch.  The back crotch is a little tight but the front crotch is a little loose.  I'm going to play with the crotch shape,break and extension settings in the Style Editor of PatternMaster Boutique4 and see if I can figure this out. 

I also added a back yoke but it's purely esthetical.  My lower back darts are 7" long so I transfered the dart to the center back seam and then cut off the yoke.  I like how it breaks up the length, especially since these are waist length.

I omitted the pockets in this muslin.  They were quite easy and they don't affect the fit.

And I tried my hand at flat felled seams.  I've wanted to do flat felled seams for a long time but curved seams scared me.  I figured a muslin would be a good place to practice.  Turns out all you need is a tailor's ham.  They are quite fun and look very neat from both sides. 

Friday, November 19, 2010

New Project and Renovations

After fitting my pants sloper - which you can see here - I've decided to make myself some old school jeans.  I'm going for something similar to what Freddies of Pinewood carries.  Here is my first muslin.  It's not bad.....for a stab in the dark!
 They are tight.  Like, "Tell me 'bout it, stud..." kinda tight.  I will definitely need to add some ease in the crotch length, and then a tad more ease in the hips and waist. 

And here is my new and improved closet.  You can see my old closet here.  I'm so glad this is done; it was really starting to eat me up inside.  It took about 4 months to complete.  I know!  A freakin' closet!  My husband and his father gutted the old closet, opened it up into the second closet, and then put up drywall.  I taped, mudded, sanded and painted.  Then I put up some closetmaid systems.  I didn't buy the kit, I costumized it and just picked up what I needed.  So for the first closet, I have shelving and a low rod for hanging pants and skirts.   


And in the second closet I installed two rods, one above the other.  It's a lot bigger than the picture suggests. 

I love my new closet.  I'm going to make a curtain to cover it.  But it will be very heavy and hang straight and flat like a tapestry.  Something with a big bold design. 


Friday, November 5, 2010

The Secret Skirt and Other News

Hello lovely readers!  It's been a while....a very crazy while actually.  I quit one of my jobs.  Don't worry I gave two weeks notice and everything.  It just wasn't working for me anymore.  Between my hours changing, and my husbands hours, we were hardly seeing each other anymore.  So now I have lot's of time to sew and see to my family's needs and I am loving it. 

Here is a skirt I put together this week.  It's a simple tapered skirt with a cut-on double inverted box pleat.  I used PatternMaster Boutique software to draft the skirt.  I made it specifically to wear with this sweater that I found at an estate sale.  It is a Wolsey and is likely late 50's early 60's.  I'll be wearing this ensemble to a party at my husbands work tomorrow.  I'm really excited!


Here is a close up of the double inverted box pleat. 

Wednesday, November 3, 2010

Giveaway Alert!

I just found this great blog and they are hosting a giveaway!  Check it out.

Friday, October 29, 2010

GIVEAWAY ALERT!

Dollie at The Rockabilly Socialite is hosting a fabulous giveaway!  Make sure you check out her blog.  You can enter the draw here.

Thursday, October 14, 2010

PatternMaster Boutique 4: Pants sloper III

My last sloper had too much crotch in the front.  You can see here when I bend forward slightly....yuck!
 Here it is with the excess pinned out. 
 Now with the excess pinned out I remeasured my crotch length using the bottom of the waistband to locate my waist.  Whooa!  25.5!  That's a long way from the 28" I used in my first sloper.   I remeasured the crotch length while wearing my first sloper and I got 27" because of all the extra fabric.  Here is the third sloper with the new crotch length.  Much better! 


Tuesday, October 5, 2010

PatternMaster Boutique4 : Pants sloper II

Well here is the second sloper for my pants.  You can see the first sloper here.  The crotch is better but I think I can still reduce the crotch length.  Also, my butt looks like it's melting from the side.  That's not a good look for me.  I'm not sure how I will remedy that yet.  It may take care of itself when I reduce the croth length further, or I may need to raise the hip depth one inch.  We'll see!


Wednesday, September 29, 2010

SCORE!!!

My husband got a haircut this weekend, and I tagged along.  I saw this beauty by the front door of the barber shop.  I asked them why it was outside, and they said they were throwing it out.  "Does it work?"  "Oh ya." "I'll be right back!!!!!"  So we got our truck and brought this baby home.  The make is Helen Curtis and it is called Cool Temp.  Trademark registered in the mid 70s.  It has a timer and heat setting.  Adjustable hard bonnet and a built in ashtray.  I'm going to clean it up and set it up in my basement rec room, which is also my sewing studio.  It will be a fun piece of furniture, a conversation piece, and a lifesaver, on the days I can't wait for my set to air dry.  I don't know what to do about the back yet.  It's kinda ugly and mangy looking.  I'll keep you posted!


Monday, September 27, 2010

PatternMaster Boutique4: Pants sloper

Here is my first fitting for the PatternMaster Boutique4 pants. This is just the sloper. You can see my fitting for the dress sloper here.


Everything looks pretty good. The only thing that needs to be changed is the crotch length. I used an elastic to locate the waist and when I measured the crotch length I used the upper edge of the elastic which added an inch. It's hard to see in the pictures but the crotch of the pants is very low.